Tutorial <<
Previous Next >> rb
Examples
針對 https://mde.tw/reeborg/ 伺服器 world 與 python 解題程式的對應呼叫, 必須從根目錄指向 /reeborg/ 之後再接 world 與 python 程式所在路徑, 如下所示:
https://mde.tw/reeborg/?lang=en&mode=python&menu=/reeborg/worlds/menus/select_collection_en.json&name=Alone&url=/reeborg/worlds/tutorial_en/harvest1.json&editor=/reeborg/python/harvest1.py
接下來希望能選擇性操縱是否列出 menu 超文件頁面.
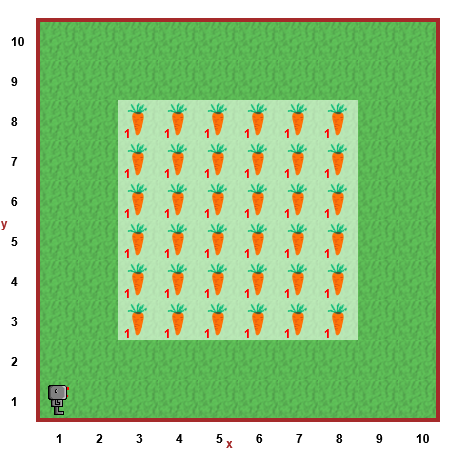
Alone with the following programs:
# use turn_left() to define turn_right() function
def turn_right():
    for i in range(3):
        turn_left()

# setup the world by using api functions: https://aroberge.github.io/reeborg-api/
RUR.set_world_size(3, 3)
RUR.add_final_position("house", 3, 1)
RUR.add_wall("east", 1, 1)

# start to go home
turn_left()
move()
turn_right()
move()
turn_right()
move()
turn_left()
move()
Reference: https://aroberge.gitbooks.io/reeborg-s-world-advanced-world-creation/content/
呼叫伺服器 python 目錄中的 harvest1.py:
https://mde.tw/reeborg?lang=en&mode=python&menu=/reeborg/worlds/menus/select_collection_en.json&name=Alone&url=/reeborg/worlds/tutorial_en/harvest1.json&editor=/reeborg/python/harvest1.py
呼叫外部伺服器中的 harvest1.py:
https://mde.tw/reeborg?lang=en&mode=python&menu=/reeborg/worlds/menus/select_collection_en.json&name=Alone&url=/reeborg/worlds/tutorial_en/harvest1.json&editor=https://mdewcm2025.github.io/hw-scrum-1/python/harvest1.py
URL 網址中的變數設定:
lang=en
mode=python
menu=/reeborg/worlds/menus/select_collection_en.json
name=Alone
url=/reeborg/worlds/tutorial_en/harvest1.json
editor=/reeborg/python/harvest1.py
在近端靜態網站中的 reeborg url 變數:
?lang=en&mode=python&menu=/reeborg/worlds/menus/select_collection_en.json&name=Alone&url=/reeborg/worlds/tutorial_en/harvest1.json&editor=https://mdewcm2025.github.io/hw-scrum-1/python/harvest1.py

or

?lang=en&mode=python&menu=/reeborg/worlds/menus/select_collection_en.json&name=Alone&url=/reeborg/worlds/tutorial_en/harvest1.json&editor=/python/harvest1.py
def turn_right():
    for i in range(3):
        turn_left()

def forward():
    while not wall_in_front():
        move()

while(1):
    forward()
    if wall_in_front():
        turn_left()
        forward()
from library import UsedRobot

# Create two robot instances with different starting positions
robot1 = UsedRobot(1, 1, 'e')  # Robot 1 starts at (1, 1) facing east
robot2 = UsedRobot(3, 1, 'e')  # Robot 2 starts at (3, 1) facing east

# Move both robots 3 steps east
for _ in range(3):
    robot1.move()  # Robot 1 takes a step
    robot2.move()  # Robot 2 takes a step

# Optional: Print a message to indicate completion
print("Both robots have finished moving!")
from library import UsedRobot

# Custom class to track robot position
class TrackedRobot(UsedRobot):
    def __init__(self, x, y, orientation):
        super().__init__(x, y, orientation)
        self.x = x
        self.y = y
        self.orientation = orientation  # 'e', 'n', 'w', 's'

    def move(self):
        # Update position based on orientation
        if self.orientation == 'e':
            self.x += 1
        elif self.orientation == 'w':
            self.x -= 1
        elif self.orientation == 'n':
            self.y += 1
        elif self.orientation == 's':
            self.y -= 1
        super().move()  # Call the parent move method to update the world

    def turn_left(self):
        # Update orientation
        directions = {'e': 'n', 'n': 'w', 'w': 's', 's': 'e'}
        self.orientation = directions[self.orientation]
        super().turn_left()

    def get_position(self):
        return (self.x, self.y)

# Create two robot instances
robot1 = TrackedRobot(1, 1, 'e')  # Robot 1 starts at (1, 1) facing east
robot2 = TrackedRobot(3, 1, 'e')  # Robot 2 starts at (3, 1) facing east

# Move both robots 3 steps east
for _ in range(3):
    robot1.move()  # Robot 1 takes a step
    robot2.move()  # Robot 2 takes a step

# Print their final positions
print("Robot 1 final position:", robot1.get_position())
print("Robot 2 final position:", robot2.get_position())
Tutorial <<
Previous Next >> rb